AWS Cloud Operations & Migrations Blog
Using AWS OpsWorks for Chef Automate to Manage EC2 Instances with Auto Scaling
Amazon EC2 instances are often created and destroyed as demand dictates. Auto Scaling is great for dynamically scaling servers so that EC2 resources are consumed only when they are necessary. This blog post will show you how to connect EC2 instances created by an Auto Scaling group to an AWS OpsWorks for Chef Automate server. When EC2 instances are launched in an Auto Scaling group, they will be added to the Chef Automate node list and configured. New nodes will be added automatically when the group scales up and removed when it scales down.
Step 1: Create a VPC with a private and public subnet
In the example used in this post, EC2 instances will be configured to launch in a private subnet in a VPC. A CloudFormation template will be used to create a VPC with a public and private subnet and a public-facing load balancer. This template will also launch a single EC2 instance that is preconfigured with the ChefDK to function as a workstation that can connect to Chef in the private subnet.
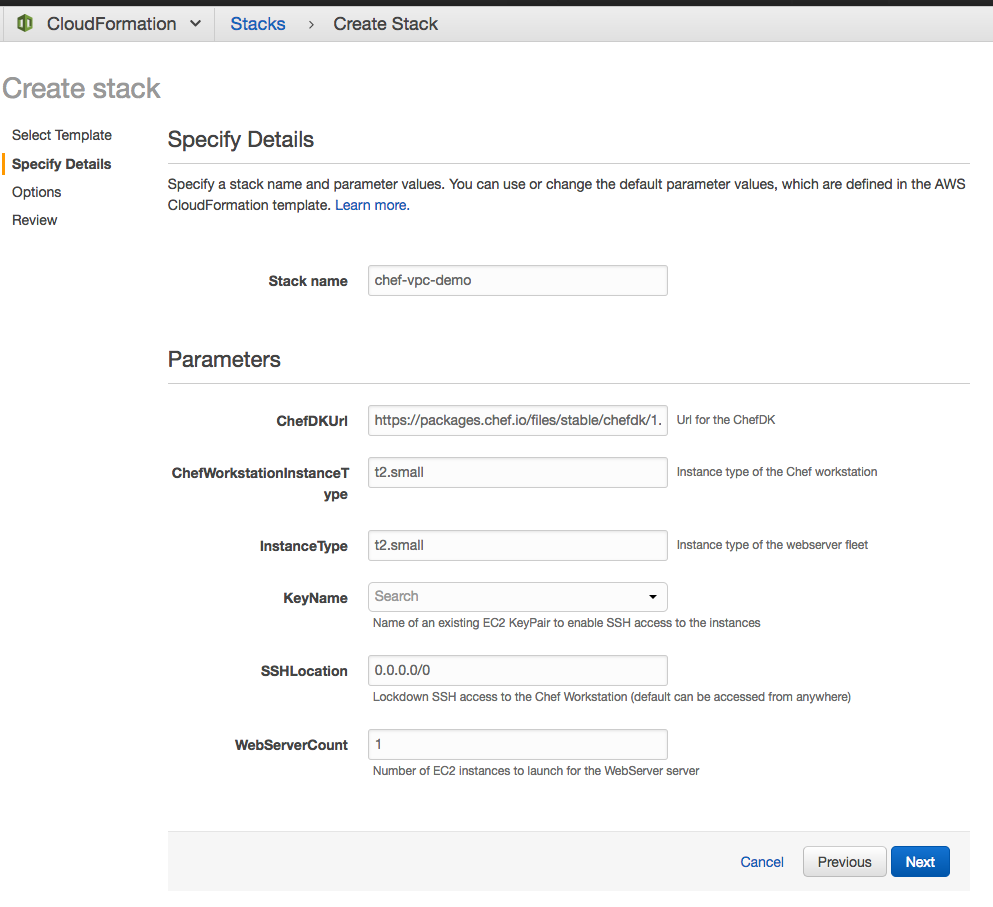
- Open the AWS CloudFormation console and create a stack using the CloudFormation template.
- For KeyName, choose an existing EC2 key pair for SSH access.
- Use the default values for the other parameters.
When the stack is complete, there are two outputs:
- The address of the Chef workstation for SSH access.
- The address of the load balancer that will be attached to an Auto Scaling group in the steps that follow.

On the Resources tab for the CloudFormation stack, make a note of the values for the following:
- AssociateNodeIAMRole
- DisassociateNodeIAMRole
- PrivateSubnet
- PublicElasticLoadBalancer
- WebServerSecurityGroup
- ChefConfiguredLaunchConfiguration
- ChefConfiguredAutoScalingGroup
- VPC
These physical IDs will be used in the steps that follow.
Step 2: Create a Chef Automate server
AWS OpsWorks for Chef Automate makes it possible to launch a Chef server in just a few clicks.
- Open the AWS OpsWorks console and choose the option to create a Chef Automate server.
- Type “chef-vpc-demo” as the name for the Chef Automate server and choose an instance type.
- On the Configure advanced settings page, select the VPC and private subnet created by CloudFormation. The VPC name will be “OpsWorks Demo” and the Subnet will be “Private”.
- Because this server will be launched in a private subnet, for Associate Public IP Address, select No.

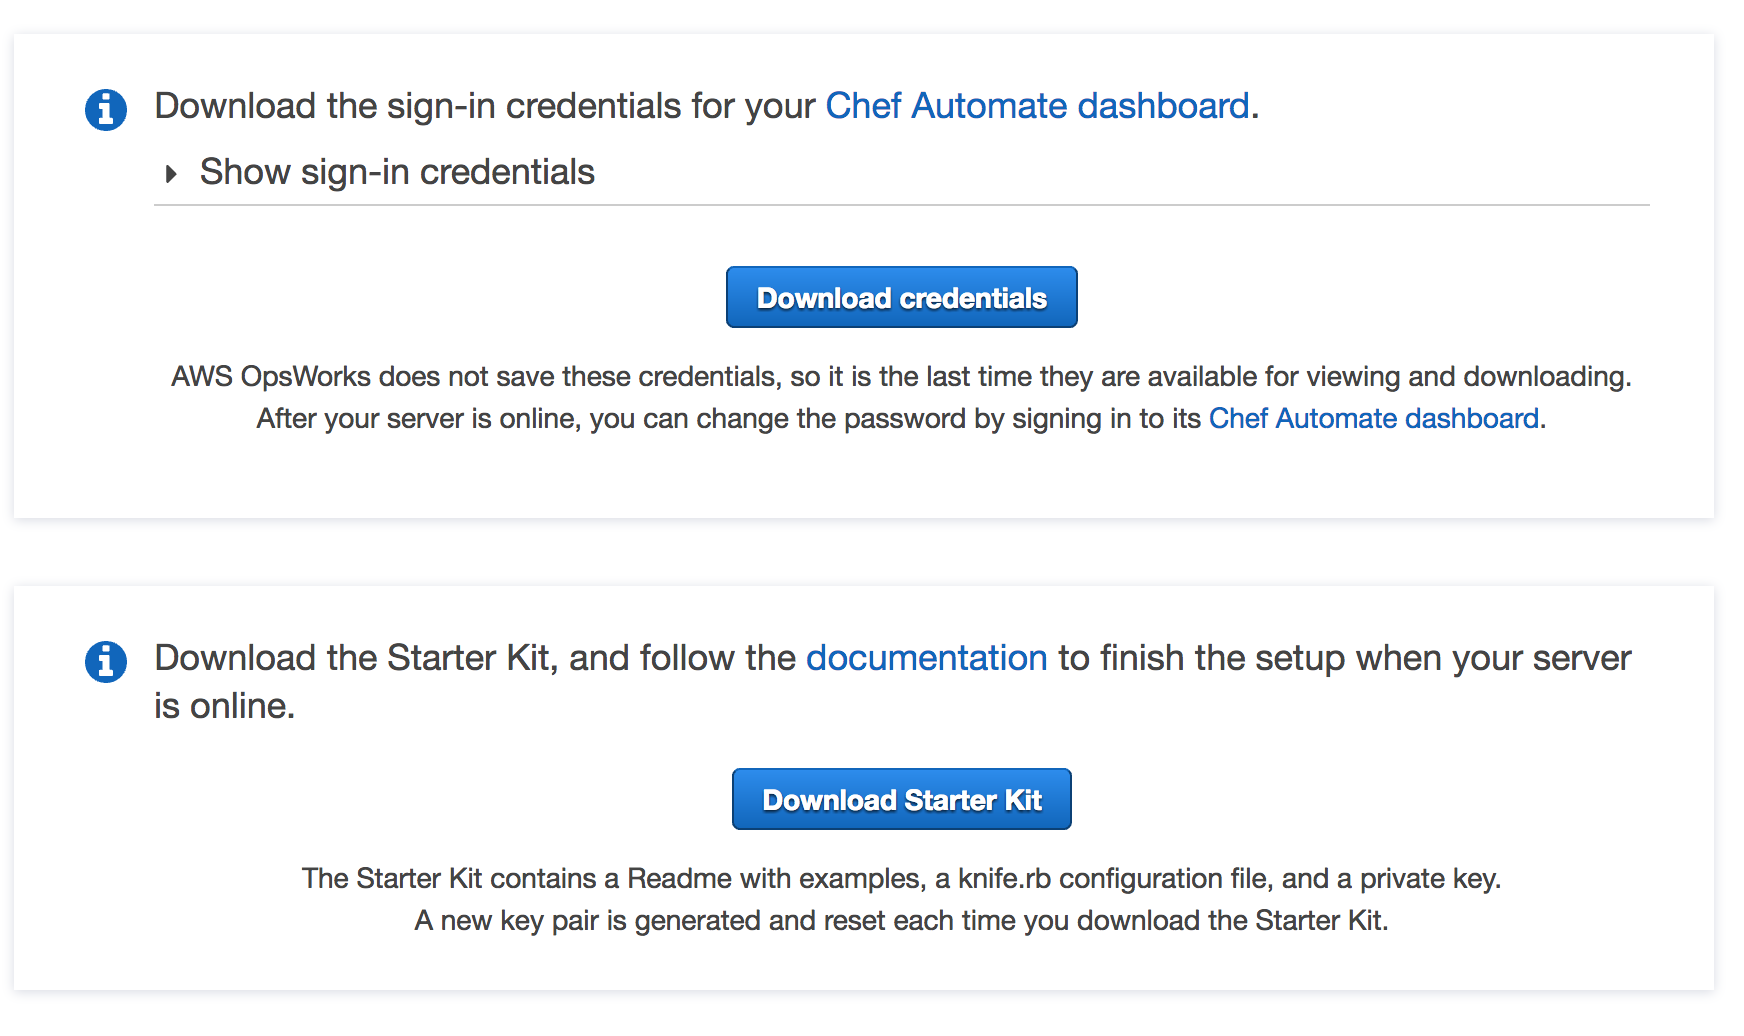
While the Chef Automate server is being created, you will be presented with an option to download a starter kit.
- Choose Download Starter Kit to save the starter kit as a zip file on your computer.
- Download the credentials for accessing the Chef Automate web UI. These credentials can be used to connect to the Chef Automate web interface.
Step 3: Copy the starter kit to the Chef workstation server
The starter kit contains an empty Chef repository for cookbook development that is preconfigured to connect to the Chef Automate server. To use it, copy the starter kit to the Chef workstation that was created with CloudFormation.
To upload cookbooks using the starter kit:
- Transfer the starter_kit.zip file to the Chef workstation (see the CloudFormation stack outputs), and then unzip it.
- Add the cookbook “web-demo” to the Berksfile in the starter kit directory by adding the following line to the file:
cookbook "web-demo", git: "https://github.com/awslabs/opsworks-chef-automate-demo" - Run the following commands in the starter kit directory to install the cookbooks and upload them to the OpsWorks Chef Automate server:
 berks install
 SSL_CERT_FILE=.chef/ca_certs/opsworks-cm-ca-2016-root.pem berks upload
- Run “knife cookbook list” to confirm the cookbooks are on the Chef server.

Step 4: Create a launch configuration to register EC2 instances on boot
Launch configurations are templates used by an Auto Scaling group to launch EC2 instances.
Note: Although the CloudFormation stack created a launch configuration, you are creating a new one here because the user data needs to be updated. (Launch configurations cannot be modified.)
To create a launch configuration for the OpsWorks Chef Automate server that uses the userdata.sh script included in the starter_kit.zip:
- In the EC2 console, choose Launch Configurations.
- Choose the launch configuration that was created by the CloudFormation stack.
- Under Actions, choose Copy Launch Configuration.
- Choose Edit details.
- In Advanced Details, paste in the “User data” the contents of the userdata.sh file that was in the downloaded starter_kit.zip file.
- In pasted content, set
RUN_LIST="recipe[chef-client],recipe[web-demo]".
The user data will be used to register a new node when EC2 instances are launched. It will install the AWS CLI and use it to associate the EC2 instance on boot. It will install the Chef client, configure it to use the OpsWorks Chef Automate server, and run the recipes specified in the run list.

Step 5: Create an Auto Scaling group associated with the public-facing load balancer
Auto Scaling is a service for launching or terminating EC2 instances automatically based on user-defined policies.
To create an Auto Scaling group using the launch configuration created in the previous step:
- In the EC2 console, choose Auto Scaling Groups.
- Select the Auto Scaling group created by the CloudFormation stack.
- Under Actions, choose Edit.
- Change the launch configuration to the one you just created.
- In the Desired field, set the number of EC2 instances to 2, and then choose Save.

After the Auto Scaling group is updated, a single instance will be created.
After the instance is online, you will see this instance added to the node list of the OpsWorks Chef Automate server.
- Connect to the Chef workstation EC2 instance using SSH.
- In the starter kit directory, issue a knife node list command.

Step 6: Create a Lambda function to disassociate nodes on EC2 instance termination
AWS Lambda is a compute service that lets you run code without provisioning or managing servers. To remove nodes from the OpsWorks Chef Automate server on termination, you use a function to call the disassociate-node using the AWS SDK.
To create a Lambda function:
- In the Lambda console, choose Create a Lambda function.
- Choose Blank Function. For Name, type OpsWorksDisassociate. For Runtime, choose Python 2.7.
- In the code box, paste the following code, be sure that the ServerName matches the name of your OpsWorks Chef Automate server.
- In Lambda function handler and role, choose DisassociateNodeIAMRole, which was created by the CloudFormation template.
from __future__ import print_function
import logging
import boto3

LOG = logging.getLogger()
LOG.setLevel(logging.DEBUG)

def lambda_handler(event, context):
    opsworks_client = boto3.client('opsworkscm', region_name=event['region'])
    resp = opsworks_client.disassociate_node(ServerName='chef-vpc-demo', NodeName=event['detail']['EC2InstanceId'],
    EngineAttributes=[dict(Name="CHEF_ORGANIZATION", Value="default")])
    if resp['ResponseMetadata']['HTTPStatusCode'] == 200:
        LOG.debug("Disassociated node {}".format(event['detail']['EC2InstanceId']))
Note: Make sure that ServerName matches the name of the AWS OpsWorks Chef Automate server that was created earlier.
Step 7: Add a CloudWatch rule to trigger the Lambda function on instance termination
Amazon CloudWatch rules match incoming events and can trigger targets, such as an AWS Lambda function.
To create a CloudWatch rule that will trigger the Lambda function on instance termination:
-
-
- In the CloudWatch console, choose Rules.
- Choose Create rule. For Service Name, choose Auto Scaling. For Event Type, choose EC2 Instance Terminate Successful.
- For the Auto Scaling group name, use ChefConfiguredAutoScalingGroup, which was created by the CloudFormation template.
- Choose Add target and use the Lambda function you created earlier.
-

Validate Auto Scaling with Chef
Now that the OpsWorks Chef Automate server is connected to Auto Scaling, nodes will be added when EC2 capacity is scaled.
To increase the number of EC2 instances in the Auto Scaling group to five:
-
-
- In the EC2 console, choose Auto Scaling Groups.
- Select ChefConfiguredWebserversASG.
- Choose Edit and increase the number of instances to 5.
-

After the EC2 instances appear in the console as InService, the number of nodes registered on the OpsWorks Chef Automate server will increase:

Now choose Edit on the Auto Scaling group and decrease the desired instances to 2.
Confirm that the number of servers is reduced and that the knife node list shows two nodes instead of five:


We hope you enjoyed this post about how to use OpsWorks for Chef Automate in a dynamic environment using Auto Scaling. AWS OpsWorks for Chef Automate makes it possible to manage infrastructure in a dynamic environment, saving money and creating instances on demand when they are most needed.